Friday, August 29, 2008

Change Color with Hue/Saturation

1. Open your image and duplicate its background layer.


2. Staying in the layer copy go to Image > Adjustment > Hue/Saturation

3. Check Colorize in the Hue/Saturation panel and adjust Hue and Saturation until you have the color you want in the desired place of the image (Hue will change color, Saturation - its intensity). Don't bother about the rest of the image, we will deal with it in the next step.


4. Add a layer mask to the layer with modified color and choose a round soft brush. With the foreground color set to black start masking the parts of the image you don't want to be colorized.


5. You can correct what you are doing at any time by changing the foreground color to white and revealing the masked part.


6. After masking is done you can regulate the intensity of the color by changing the layer opacity. I set it to 66%.


If the layer is retained for further use in a .psd file you can change the color of your object to any other at any moment.
Sunday, August 3, 2008

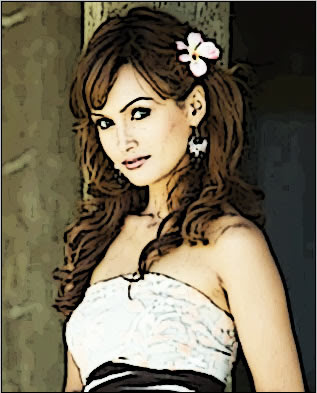
Photo to Illustration (Quick Vector Art)

I am going to show you that is quick and easy way to convert a picture in illustration vector effect. Here we go!

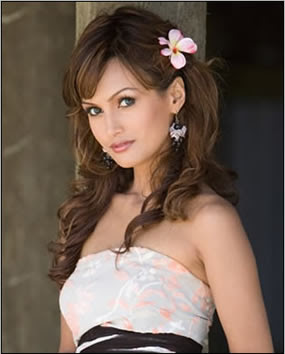
Step 1: First I will start with an image.


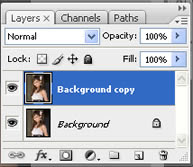
Step 2: Duplicate the Background layer.


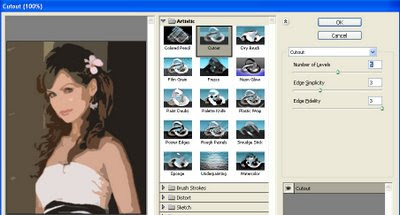
Step 3: Now apply the Cutout filter (Filter => Artistic => Cutout). On the left side the amount of detail in the vector can be controlled by adjusting the Number of Levels, Edge Simplicity and Edge Fidelity sliders. For this example I am using 5 levels, with the Edge Simplicity set to 3 and Edge Fidelity set to 3. Click OK.


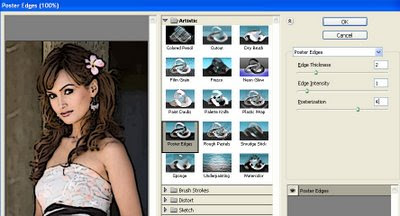
Step 4: You can trace the areas of color divided by the Cutout filter with the Poster Edges Filter. For this example the Edge Thickness is set to 2, Edge Intensity to 1 and Posterization to 4. Click OK.


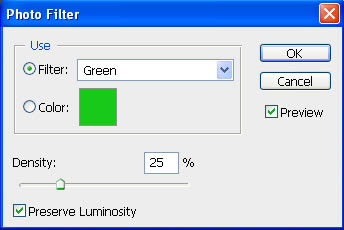
Step 5: The color can be changed subtly with a Photo Filter adjustment layer.


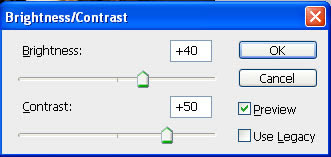
Step 6: And finally, to add to the 'colored' effect, a Brightness/Contrast adjustment layer will help take away the natural highlights/shadows even more.


Step 7: Here is my final vector image: