Monday, May 31, 2010
How to Sharpen Photo without Increasing Noise Visibility
Sometimes it happens that we need to sharpen photos for which there is noise, for example, pictures taken at night. But overall increase in photo sharpness increases and the noise visibility also. How to be in this situation? I can show you one method in Photoshop, how to avoid it.
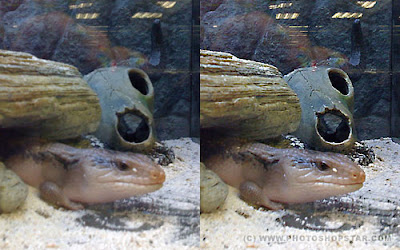
First of all you should find some appropriate photo to work with. I prefer to use this one below.
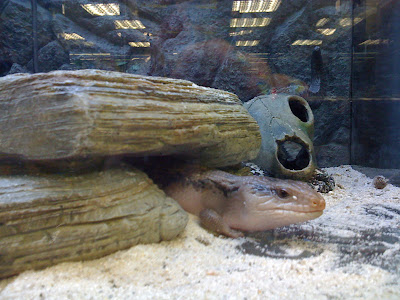
Open up this photo and start the tutorial. Go to Channel panel (Window > Channels). The first step is to look at the channels palette and determine which color channel best represents the area we want to capture. To the right, shown from top to bottom, you can see the red, blue, and green channels for this image. It’s obvious that the red channel contains the most information because it is most light. Click on the red channel and drag it down to the new channel button to create copy of it.
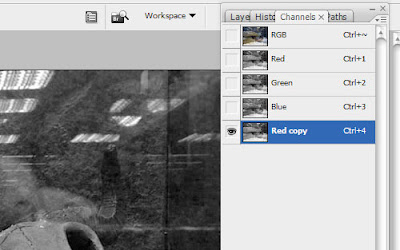
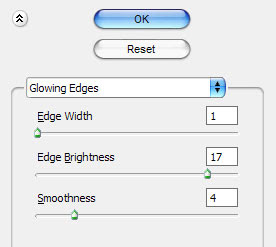
We got the copy as you can se on the above picture. Then apply for copied channel Filter > Stylize > Glowing Edges with similar settings to these:
Now we have effect like this:
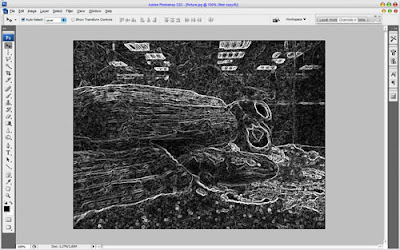
Hold the Ctrl button and click the Red copy thumbnail in the channels palette to load selection of this channel.
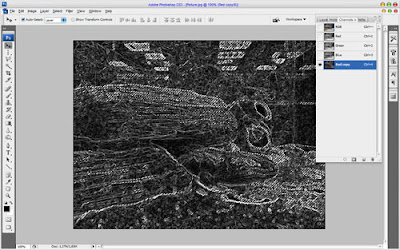
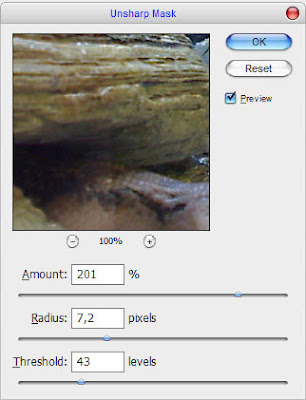
After that we can delete this channel: click on the Red copy channel and drag it down to the delete current channel button to delete it. Then go to layers palette (Window > Layers) and press Ctrl+H to hide selection temporary, but don’t remove selection for now! It is important! Then apply Filter > Sharpen > Unsharp Mask with some suitable presets for the photo. Pay your attention that for each photo presets should be individual. I tried following presets:
See the result now:
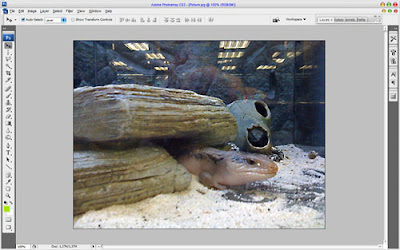
Now, we have some selected area, but it is hidden for now, press Ctrl+H again to make it visible. Then press Ctrl+J to duplicate selected area to new layer. Then apply Filter > Sharpen > Sharpen Edges:
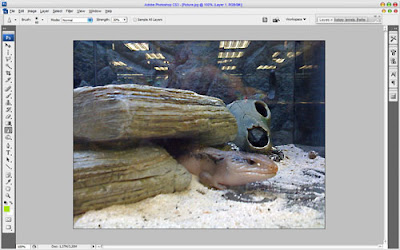
That is it for now. We sharpened photo without increasing the noise visibility. Hope, you got some interesting knowledge from this tutorial.
Sunday, May 23, 2010
Fairness Cream - Before and After Effect
In this tutorial we will take close up of a face with dark complexion and turn into a significantly lighter tone to create an after effect of using the cream. This effect can be performed on any part of the body.
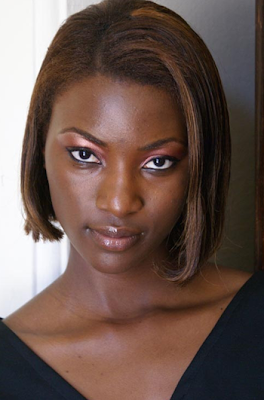
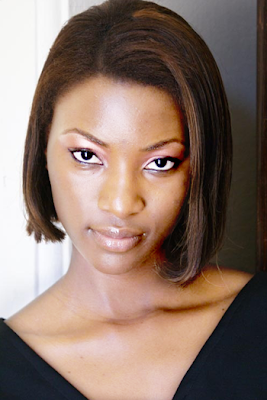
1. We need to choose image, I picked up the one below, with a darker skin (to achieve better effect).
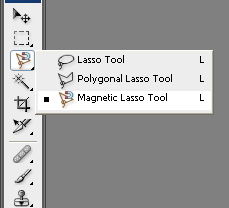
2. Now, we need to create the selection of area of face on which we are going to work. You can choose any selection method you want. For this image magnetic lasso would be a great time saving selection tool.
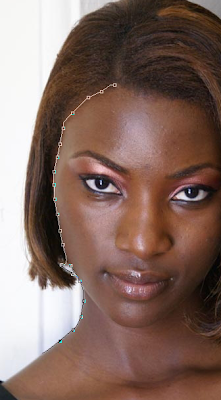
3. Using magnetic lasso tool, click on any starting point on the boundary of her face. Then just keep moving on sides of the skin area till you reach the starting point again.
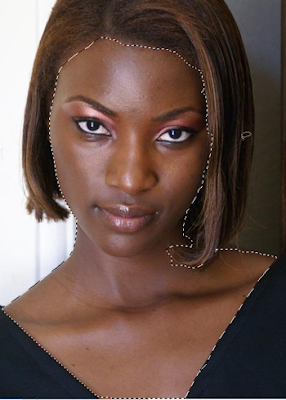
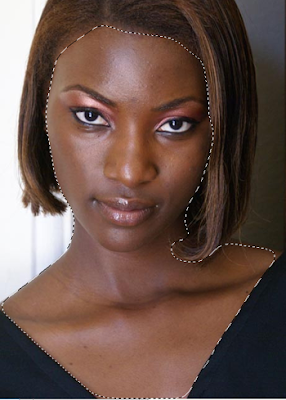
4. Once you complete it, this will convert into a selection as shown below.
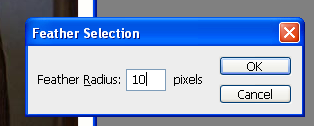
5. Now press Ctrl+Alt+D to feather the selection. Set Feather Radius to 10. Just like shown on picture below.
The selection will smoothen up as shown below.
6. Now we need to copy and paste our selection in a new layer. Do that by pressing Ctrl+C and then Ctrl+V, and you should have a new layer containing only skin we’ve selected before.
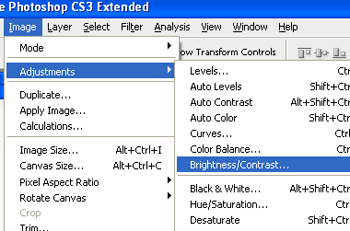
Stay on this new layer and go to Image menu select Adjustments>>Brightness/Contrast. (see the picture below)
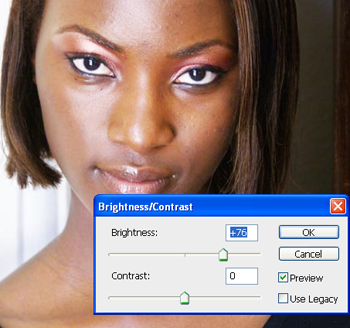
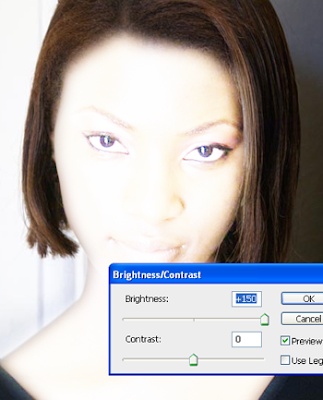
Increase brightness to a high value. Tick the “Preview” box (if it isn’t ticked already) and you will see the effect in action in real time. See the image below to check settings I used.
Note that, this values may not be perfect for your pictures so it’s the best for you to choose them as you wish or like
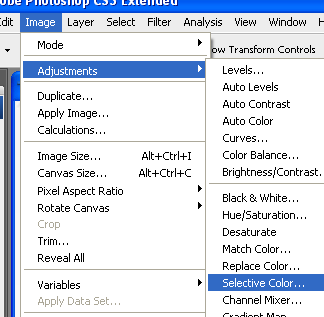
7. From Image menu select Adjustment>>Selective color (just like shown on picture).
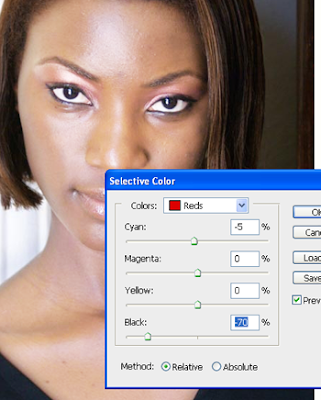
Make sure, selected color range is Reds on top. Then reduce Black to a large negative value as shown below. You may also try reducing cyan too and see in the preview if its lightens the skin color.
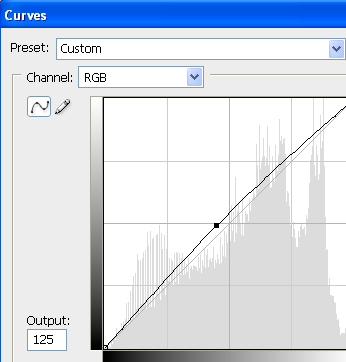
8. Again from Image menu select Adjustments >> Curves or press Ctrl+M to open curves editor. Click in center and drag a little upwards. Don’t overdo this or else the image will look burnt. Take a look at the picture below.
Now in Layers window duplicate the face layer and go to Image > Adjustments > Brightness/Contrast. Increase brightness to an insanely high value.
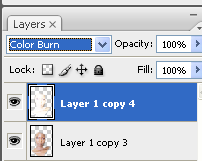
Go to Layers window once again and change layer mode (on duplicated layer) to Color burn.
And voila! You’ve done it.
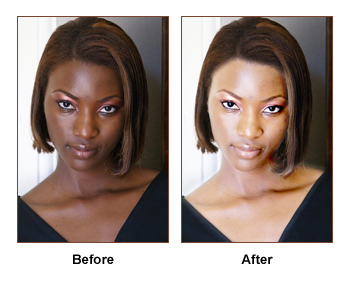
Here’s my result.
A closer look (before & after).
Subscribe to:
Posts (Atom)