Thursday, February 12, 2009

Blissful Glow

Add a blissful glow to the highlights of a photo. This effect works well with portraits.

Bloom Photoshop Tutorial

Step 1

Open an image to edit.


Step 2

Duplicate the layer (Layer> Duplicate Layer or Ctrl+J) and change the blending mode of the new layer to Screen.


1. Add a layer mask to the top layer (Layer> Layer Mask> Reveal All). Make sure that the layer mask is selected.


Step 3

Use the Apply Image tool to apply the Background layer to the layer mask. To do this, open the Apply Image tool (Image> Apply Image) and change the Layer to Background and click OK.


Step 4

Hold the Alt key and click on the thumbnail of the layer mask.


Step 5

With the layer mask still activated, use the Threshold tool (Image> Adjustments> Threshold) and adjust the slider to define where the bloom Photoshop effect will be visible.


Adjusting the Effect
We're now ready to edit the effect. This section is where we'll see the bloom effect in action.

Step 6

Click on the thumbnail of the layer (not its layer mask) to deactivate the layer mask.


Step 7

Open the Gaussian Blur filter (Filter> Blur> Gaussian Blur). Ensure that Preview is enabled and increase the radius to achieve your desired effect.


Step 8

Inside the Layers pallet, click on the thumbnail of the layer mask to activate. Use the eraser tool (E) to erase the bloom Photoshop effect wherever you do not want the effect to appear. Use the brush tool (B) to add areas where you would like the effect to appear. To start, use a brush or eraser with a low hardness and an opacity of around 50%.
{mostip image=tipon}Press the "[" and "]" keys to adjust the size of the brush quickly.{/mostip}


Final Results


Monday, January 19, 2009

Convert a Real Photograph into Comic Book Photograph

Step 1: open any picture in Photoshop you feel right for this effect.


Step 2: Duplicate copy of the Background by Selecting the Duplicate Layer Option from the Layer Menu. We do this just in case any mistake is done then we do not end up ruining the original Image.


Step 3: Now Increase the brightness of the photograph by select the option Shadow/Highlight from the image menu as shown in the screenshot below.


In the Shadow/Highlight Dialog box take the shadow slider to 100% to fully brighten up the image.


Step 4: Go to the Filter menu and select the Find Edges menu, this option will convert the Photograph into an image given below.


Step 5: Using the Fade Find Edges option in the Edit menu we will get the desired effect.


In the Fade Find Edges Dialog box change the Mode Menu to Luminosity from Normal and move the Opacity Slider till you get the desired effect.


The Final Image is given below.

Wednesday, December 24, 2008

How to create light beams with Photoshop


Do you want to create some awesome light beams with ONLY Adobe Photoshop? It’s very easy to do with this tutorial. I’ll show you how to create a nice piece of art with any image you like. This is a “get started” tutorial, just for the basics. If you start experimenting, you get a lot of cool effects with this technique. Ok, let’s go!

Step 1: The beginning

Search on the Internet for a nice photo or use one of your own.
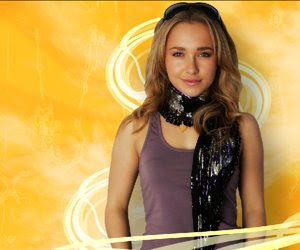
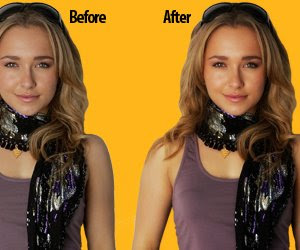
I used a photo of Hayden Panettiere (Claire Bennet from Heroes). I suggest to take a high-res image, because it’s much easier to erase the background. That said, open Photoshop and click on file -> open to open your image. To free the object from the background, I used the Polygonal lasso tool and the Eraser tool.

Use whatever suits you.


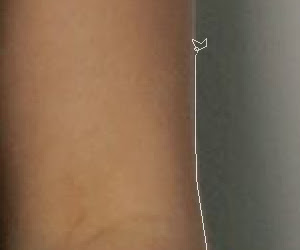
I suggest you know how to free an image from the background in Photoshop, if not, there are plenty tutorials out there to show you how to do that.


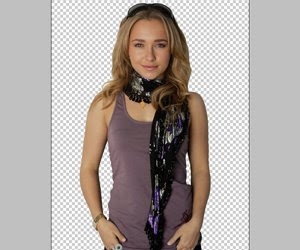
After you did this, go to file -> new and make a new document with the size you like.
I used a 1024 x 768 px with a resolution of 72 p/inch. Now copy and paste the image
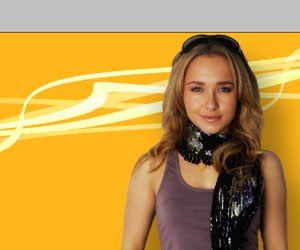
(without background) in the new document and position and scale it to make it look right! I scaled it down and positioned it a little to the right. Now fill the background with a nice bright color, I used an orange tint (#ffb61a).


Step 2: Tune the image

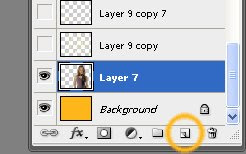
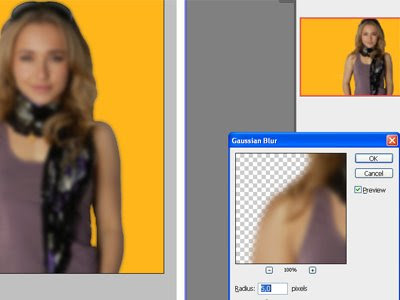
The imported image doesn’t seem right and looks fake. That’s because the original picture doesn’t have a lot of orange color. We’re going to change that so it fits better. Duplicate your image by left click on the layer and move it to the “new” icon below it.


Now select the image above the original one and go to filter -> Blur -> Gaussian Blur.
Blur it as much as you don’t see any details anymore. I used 5 pixels.


Go to your layer blending mode and click on “Overlay”. Use an Opacity of about 50%.


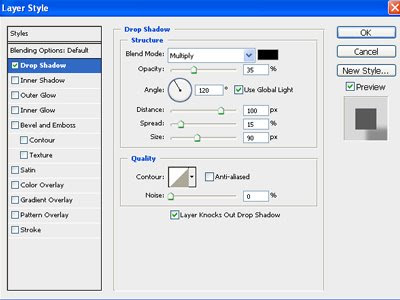
Looks much better doesn’t it? Now right click on your original photo and to go
blending options. Click on drop shadow and use these settings:


Step 3: The light beams

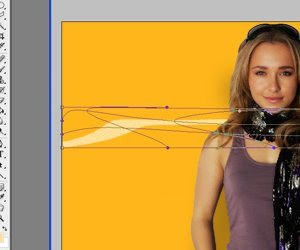
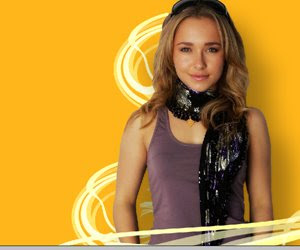
Ok now get ready for the great light beams Create a new layer, move it behind the photo and use your Line Tool (U) to draw a line diagonal.


I used 18 px weight with a somewhat lighter color then the background.
Now go to Edit -> Transform -> Warp and start moving the verticies until you get a cool shape out of it.


Repeat this step 3 times. Color all the lines with the color you like.
I used some darker and brighter orange colors. Now you could duplicate those 3 layers and mirror it so it looks like you have 6 different lines.


Step 4: Polar Coordinates

For this step, you have to copy all the layers (so you keep the original ones) and merge the new layers together. Then go to filter -> distort -> polar coordinates.
Use Rectangular to Polar.


Now you have to position and rotate the layer so that it looks like
the beams come from your image.To make the effect looks more 3d, I duplicated
the original straight layers in Photoshop and place it above the image layer so you create a fake depth.


Step 5: Finishing

To make the final image, I created some smoke and warp effects with the brush tool and made some lightning effects. Of course there is a lot you can do to make this a lot better but I hope you get the idea of this tutorial. Click on the image below to view it full size. Thanks for reading and don’t forget to leave a comment so I know all my work wasn’t for nothing. Thanks again!

Wednesday, December 17, 2008

Retouch A Girl with Lighting Focus


This tutorial will show you how to use lighting effect to emphasize her face, skin and hair. Before that, some nice tips for retouching will be mentioned


Before we start, let's have a look at what we'll be retouching:

Before:


And after:


Download the original image and we are ready to go!

Step 1:

The original photo is a bit dark and her skin is not bright and lovely enough. In this case, we can use Channel Mixer tool to enhance the colors separately. You can find this tool at the bottom of Layers tab


If you are new to this tool, I wish to explain more about it. As you knew, a photo is based on three main colors (in RGB mode): red, green and blue. With the Channel Mixer tool, you can manipulate these raw channels separately. Notice that when choosing Channel Mixer tool, you will see there are 3 options in the Output Channel drop-down box corresponding to 3 main colors. And you can also notice that with each main color, the slider of that color will always be set to 100%, by default. For example, when you choose Red from Output Channel, you can see the Red slider are at 100% (while Blue and Green are at 0%). And by moving these sliders left or right, you can decrease or increase the amount of that color in the corresponding Output Channel.

With this photo, we should mainly increase the amount of Green with the settings below:


Our photo now looks better


Step 2:

Press Ctrl-Alt-Shift-E to create a flatten image which is the result of the under layers. In this step, we will smooth her skin a bit by going to Filter>Blur>Surface Blur, set the Radius of 2 pixels and Threshold of 4 pixels


Maybe you will not see any big changes but let's have a closer look...

Before:


After blurring:


By using this tool with a small Radius and Threshold, you can make subtle changes without making it look fake

Step 3:

Go to Image>Adjustments>Curves to brighten our photo a bit


We are almost done, the photo now looks much better:


Step 4:

The last thing we need to do is to add lighting focus to emphasize her beautiful face. Press Ctrl-J to duplicate the current layer and go to Filter>Render>Lighting Effects and use these settings:


Then change the Blending mode of this layer to Soft Light to make the colors "softer". Let's have a look at the result again:


Retouching photo is fun! And with the Channel Mixer tool and Lighting Effects filter, we can greatly enhance the photo from its raw color channels and set focus on what we want without destroying the original image.