Step 1
Open any photo into Photoshop.

Step 2
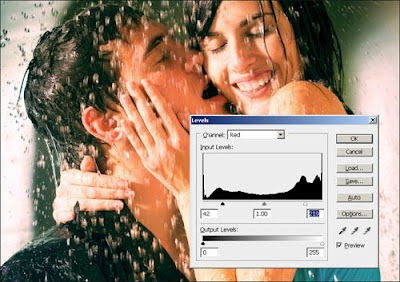
First, we'll compress the histogram in the red channel to add more contrast to the reds. Choose Layer > New Adjustment Layer > Levels. In the Channel drop down menu, select Red. Drag the black and white input slider towards the middle to increase the contrast in the reds.

Step 3
Now we're going to add a green tint to the shadows and red tint to the highlights. The Color Balance tool is the perfect tool for this. Choose Layer > New Adjustment Layer > Color Balance. In the Tone Balance option, select Shadows then enter in 0, 25, 0 in the color levels settings.

Now select Highlights on the tone balance options and enter 25, 0, 0 in the color levels settings.

Step 4
We now have the lomo effect completed and to finish it off, we'll add a Brightness/Contrast adjustment layer to add the washed out look. Choose Layer > New Adjustment Layer > Brightness/Contrast. If you are using Photoshop CS3, checkmark the "Use Legacy" option. Set the brightness to 25 and contrast to -25 then click OK.

Final Results

Other Examples


No comments:
Post a Comment