
This tutorial will show you how to turn a normal image into a contrastive one!
Step 1: First download the original photo below:
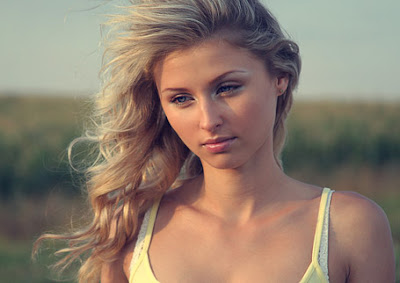
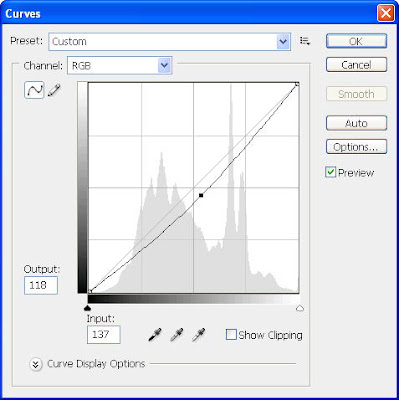
Step 2: Next we use some popular tools to adjust its contrast and brightness like Curves tool (Image>Adjustments>Curves)
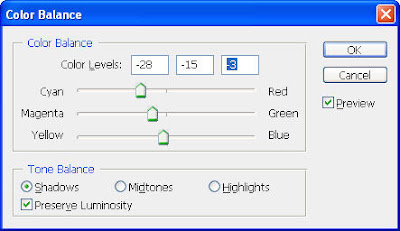
and Color Balance (Image>Adjustments>Color Balance) with these settings:
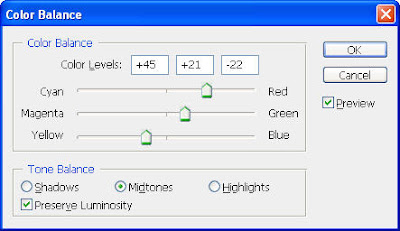
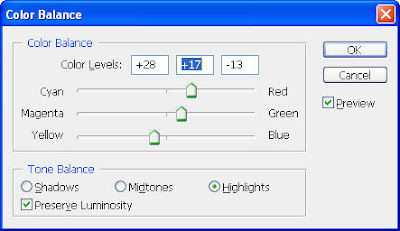
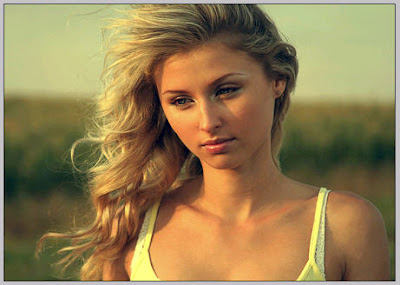
Our photo now looks like this:
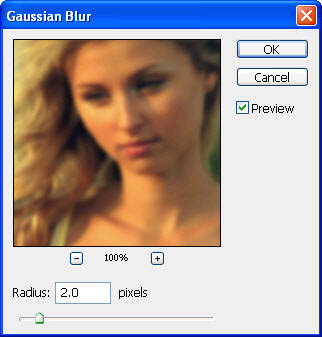
Step 3:Duplicate your photo (Ctrl-J) and go to File>Blur>Gaussian Blur and choose a radius of 2 pixels to blur this layer a bit
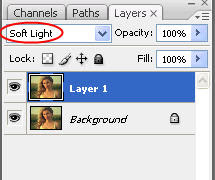
Step 4: Then from the Layers tab, change the blending mode of this layer to Soft Light
And your photo will become more contrastive like the photo below:
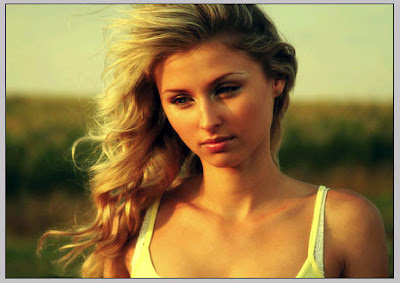
This method is commonly used to emphasize something you want on a photo by making it more contrastive with the background. The model now looks lovely and lively!
No comments:
Post a Comment