Showing posts with label Photoshop Video Tutorials. Show all posts

Wednesday, August 14, 2013

Photoshop Gradient Map Tutorials for Beginners

One of the most useful Photoshop adjustment layer is the Gradient Map that you can use to enhance your photos. You can use a gradient map as a non invasive method in which you can change the color map of your image, adding multiple color effects. Using Photoshop gradients(GRD files) you can create virtually unlimited number of color effects.
I will start this tutorial by saying that I am not a Photoshop master so I get a little confused sometimes; for example in this tutorial I will explain for all the Photoshop beginners a quick way to enhance a photo by using a Gradient Map. As you will see if you open the fill or adjustment layer tab we have to gradient options: the Gradient (Fill) and the Gradient Map; so the question is which one to choose and use? And of course what is the difference between the two of them. For the first question I will choose the first option, the Gradient (Fill) instead of the Gradient Map. For the second question I have no answer.

Gradient Map and Gradient Fill Adjustment Layers

A Gradient Map is in fact an adjustment layer that can be applied to a layer/multiple layers and to enhance the image result. Learn more about adjustment layers from this tutorial.
So let's start with a beautiful premade background. Add a Gradient adjustment like shown in the image.
Click on the gradient to open the Gradient Editor; there you can change the existing gradient, create one yourself or you can load and use one of the many Photoshop gradients available for free on the internet.
Now set the Blend Mode of the gradient map to Overlay and the opacity 45%
You can play with different gradients and you can obtain beautiful results in just a few minutes using Photoshop gradient map adjustments. In the same way you can use the Gradient Map instead of the Gradient (Fill) and see which of the results suits you best.

Thursday, September 13, 2012

How to Make a Timeless WEDDING Photo from a snapshot

Photoshop CS6 tutorial showing how to quickly transform any ordinary snapshot into a golden-hued, timeless image that will last forever. These techniques work especially well for wedding photos.

Thursday, July 19, 2012

Ways to become skinny in 3 minutes

How to become skinny in 3 minutes: This is an Old Photoshop work to show the power of this program. This video would show only one of thousand possibility that Photoshop offer to us. After using Photoshop for long time you will have anyway something to learn.

Thursday, February 16, 2012

One Moment – Manipulation Tutorial

In this Photoshop tutorial I will show you how to create a nice spotlight effect on an image using the brush tool. It’s not a difficult effect to achieve but patience is needed. I used a single stock image which can be downloaded for free. Hope you like the result.

Stock image used:
  • http://a68stock.deviantart.com/art/Laura-spring-stock-3-204105172


Monday, March 15, 2010

How to Use Gaussian Blur in Photoshop

Gaussian Blur is a filter that blurs an image. But it's also the math behind the Feather command, drop shadows, and everything that is soft in Photoshop. And here's the crazy thing: You can sharpen an image using Gaussian Blur!

Thursday, December 24, 2009

Removing Dark Circles Under the Eyes

Whether it's caused by lack of sleep, too much work, stress, skin texture and tone or whatever, lots of people have dark circles under their eyes. Since removing them requires just a tiny bit of brush work, they make a perfect candidate for a quick Photoshop retouch.

Sunday, June 28, 2009

Color Correction with Levels

Here is this video tutorial you learn how you can fix the color of your Picture using Level's Adjustment Layer..

Friday, May 22, 2009

Bring Colour and Light out of Ordinary Image

Step 1
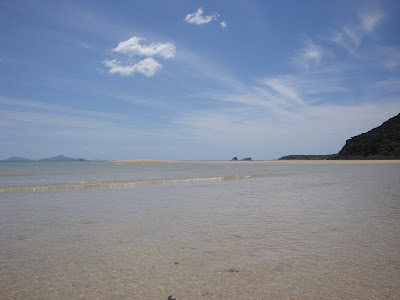
Load a photo of your choice into Photoshop. Here is mine..


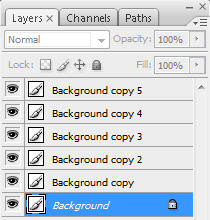
After loading your photo, duplicate the background layer five times:


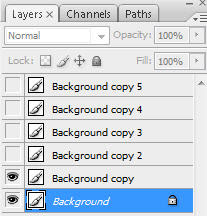
Then hide the top 4 layers and leave just the “Background copy” layer visible.


Step 2

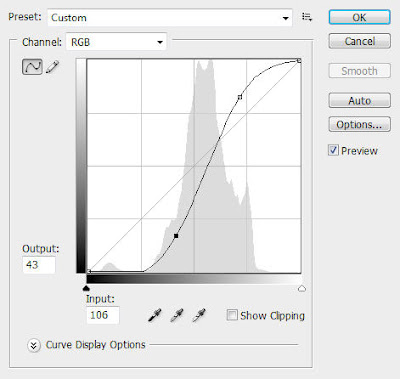
On the “Background copy” layer, hit Ctrl + M to bring up the Curve Tool and apply the following settings:


Then change the blending mode of this layer to “Overlay” with an opacity of 60%, and you will have the following image:


Step 3

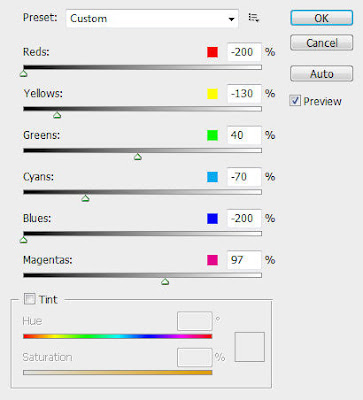
Un-hide the “Background copy 2″ layer and select it, hit Ctrl + Alt + Shift key to bring up the Black and White image adjustment tool and apply the following settings:


(Please note the settings may be different if you use your own photo, but the idea is to put more emphasis toward certain colours in the image and bring them out a bit more)

Change the layer blending mode to “Soft Light” with an opacity of 70%.

The effect so far will look like this:


Step 4

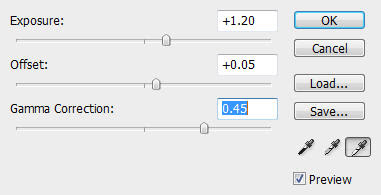
Now we can some more exposure to the image. Un-hide the “Background Copy 3″ layer and select it, go to Image > Adjustments > Exposure and apply the following settings:


Then change the layer blending mode to “Color” and you will have the following effect:


Step 5

Un-hide the “Background copy 4″ layer and select it, go to Image > Mode > Lab Color and change the image mode to LAB.

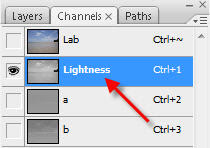
The go the Channel Palette and select the “lightness” channel:


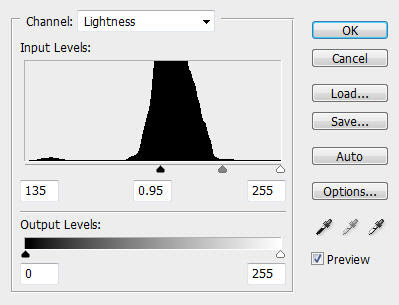
Then hit Ctrl + L to bring up the level adjustment tool, apply the following settings:


Change the image mode back to RGB mode. When you’re prompted to flatten the image, choose “Don’t Flatten”.

Change to layer blending option to “Soft Light” with an opacity of 50% and you will have the following effect:


Step 6

Now we can add some extra soft light onto the image.

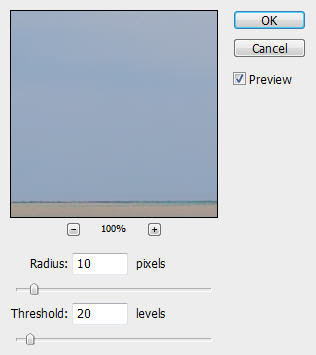
Un-hide “Background layer 5″ and select it, go to Filter > Blur > Surface Blur and apply the following settings:


Change the layer blending mode to “Screen” with an opacity of 60% and you will have the following image:


Step 7

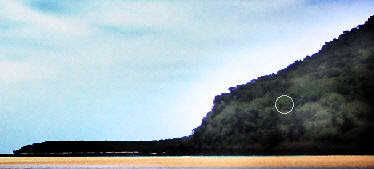
This is an optional step. As you can see after several layer blendings, the mountain on the right has become a black spot without any tree to be seen. We can bring the trees back by using the dodge tool.

Duplicate the background layer once more and put the duplicated layer just above the background layer, but beneath any other layer.

Hit “o” key to select the dodge tool, apply the following settings:


Brush over the mountain until the trees are back.


You can reduce the layer opacity a bit to get a better result, also adjust the brush size for the dodge tool if necessary.

And here is the final effect:


Ok that’s it for this tutorial! Remember you can always use the layer blending modes, curve/level tools and blur filter to bring out light and contrast for your image.

Cheers and have a nice day!

Many Thanks to www.psdvault.com

Friday, May 15, 2009

Photo To Line Drawing

This Video will show how to turn a photo into a drawing and adding a lil jazz to the image.