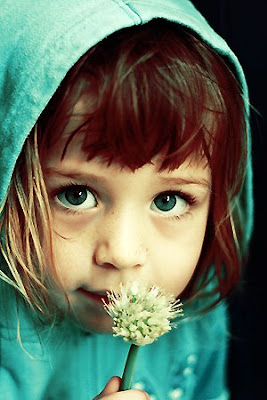
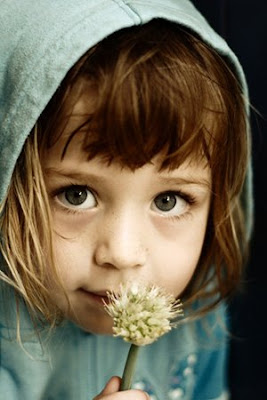
Wednesday, April 1, 2009

Photo Negative Effect

Here's a quick and easy way to convert your photographs in photo negative effect.

Step 1: First open any image in photoshop.


Step 2: Go to Image> Adjustment> Invert or press Ctrl + I.


Step 3: Go to Image> Adjustment> Desaturate or press Ctrl+Shift+U.


Step 4: Go to Image> Adjustment> Hue/Saturation or press Ctrl+U and apply these settings:


Step 5: In the final step go to Image> Adjustment> Shadows/Highlights and apply these settings:


Here's is the Final Result!:

Monday, March 16, 2009

Make a photo more contrastive

Make a photo more contrastive

This tutorial will show you how to turn a normal image into a contrastive one!

Step 1: First download the original photo below:


Step 2: Next we use some popular tools to adjust its contrast and brightness like Curves tool (Image>Adjustments>Curves)


and Color Balance (Image>Adjustments>Color Balance) with these settings:


Our photo now looks like this:


Step 3:Duplicate your photo (Ctrl-J) and go to File>Blur>Gaussian Blur and choose a radius of 2 pixels to blur this layer a bit


Step 4: Then from the Layers tab, change the blending mode of this layer to Soft Light


And your photo will become more contrastive like the photo below:


This method is commonly used to emphasize something you want on a photo by making it more contrastive with the background. The model now looks lovely and lively!

Wednesday, March 4, 2009

Blue Glow Portrait Effect

Before:


After:


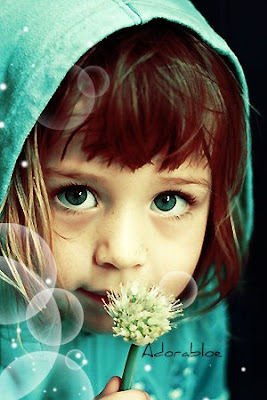
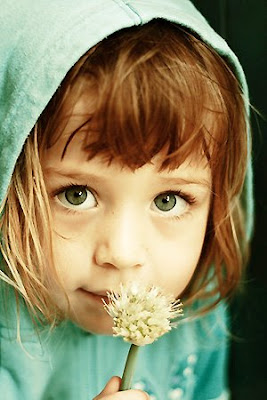
The first, open an image file as below:


Duplicate it twice, set the new layer to screen 25% & set soflight 40% for the other.


Create a new layer and put it on top. Fill color #fff200 and set softlight 41%


Now duplicate the background image.
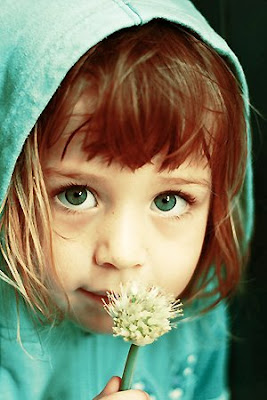
Select the new one and go to Image > Adjustment > Selective Color

Settings like this:
Red: -100. -4. +3. +100
Yellow: -81. +10. -18. 0
Neutrals: +40. -7.-36.-20

You've got this:


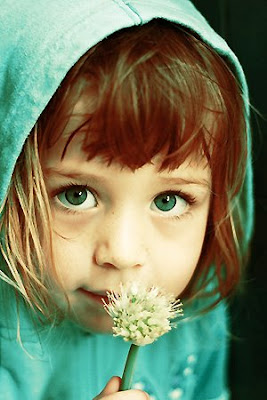
Selective color again with another option:

Red: -81.+29.+17.0
Yellow: +100.-55.0.0
Neutrals: +57.+9.-6.0

Your result:


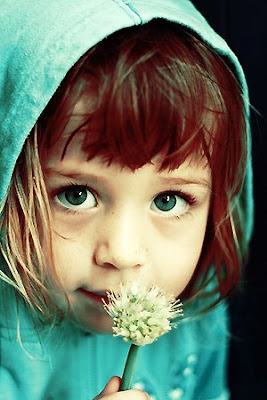
Last selective Color settings:

Red: -15.0.0.0
Yellow: -39.+41.0.0
Neutrals: +20.0.+10.0


Now go to Images> Adjustment > Color Balance:

M: +35.+15.+32
S: +8.+4.+27
H: -8.+8.-7

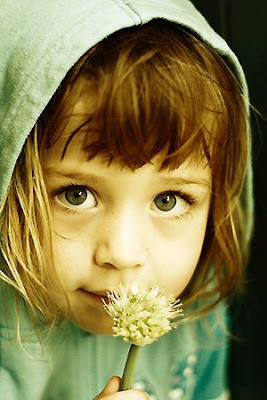
This is what you'll get:


Now press Ctrl + Shift + Alt + E. Put this new layer on top and set it Multiply, then reduce opacity to 26%


Choose Elliptical Marquee tool to make selection


Then fill color #FFFFFF for it.
Go to Select > Feather > Feather Radius: 20. Press Ok
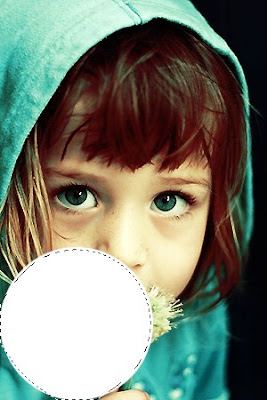

Then press Del:


Now create more bubbles by duplicate layer & use free transform:


You can use original brushes to decorate your artwork.

This is the final result:

Thursday, February 12, 2009

Blissful Glow

Add a blissful glow to the highlights of a photo. This effect works well with portraits.

Bloom Photoshop Tutorial

Step 1

Open an image to edit.


Step 2

Duplicate the layer (Layer> Duplicate Layer or Ctrl+J) and change the blending mode of the new layer to Screen.


1. Add a layer mask to the top layer (Layer> Layer Mask> Reveal All). Make sure that the layer mask is selected.


Step 3

Use the Apply Image tool to apply the Background layer to the layer mask. To do this, open the Apply Image tool (Image> Apply Image) and change the Layer to Background and click OK.


Step 4

Hold the Alt key and click on the thumbnail of the layer mask.


Step 5

With the layer mask still activated, use the Threshold tool (Image> Adjustments> Threshold) and adjust the slider to define where the bloom Photoshop effect will be visible.


Adjusting the Effect
We're now ready to edit the effect. This section is where we'll see the bloom effect in action.

Step 6

Click on the thumbnail of the layer (not its layer mask) to deactivate the layer mask.


Step 7

Open the Gaussian Blur filter (Filter> Blur> Gaussian Blur). Ensure that Preview is enabled and increase the radius to achieve your desired effect.


Step 8

Inside the Layers pallet, click on the thumbnail of the layer mask to activate. Use the eraser tool (E) to erase the bloom Photoshop effect wherever you do not want the effect to appear. Use the brush tool (B) to add areas where you would like the effect to appear. To start, use a brush or eraser with a low hardness and an opacity of around 50%.
{mostip image=tipon}Press the "[" and "]" keys to adjust the size of the brush quickly.{/mostip}


Final Results


Monday, January 19, 2009

Convert a Real Photograph into Comic Book Photograph

Step 1: open any picture in Photoshop you feel right for this effect.


Step 2: Duplicate copy of the Background by Selecting the Duplicate Layer Option from the Layer Menu. We do this just in case any mistake is done then we do not end up ruining the original Image.


Step 3: Now Increase the brightness of the photograph by select the option Shadow/Highlight from the image menu as shown in the screenshot below.


In the Shadow/Highlight Dialog box take the shadow slider to 100% to fully brighten up the image.


Step 4: Go to the Filter menu and select the Find Edges menu, this option will convert the Photograph into an image given below.


Step 5: Using the Fade Find Edges option in the Edit menu we will get the desired effect.


In the Fade Find Edges Dialog box change the Mode Menu to Luminosity from Normal and move the Opacity Slider till you get the desired effect.


The Final Image is given below.