Friday, August 13, 2010

Bring Colors to a normal image

In this tutorial I will show you a non-destructive technique to add vivid colors to your scene, turning it into a spectacular image that can impress your audience easily

Before & After:
Here is the image we will work with

And what we are going to create:

Step 1: Before walking into the main step, we should enhance its brightness and contrast a bit by going to Image>Adjustments>Color Balance. We can find here three options: Shadows, Midtones and Highlights. Adjust each of them as following:


It now looks better:

Step 2: Our scene has three parts: sky, trees and yard. First we will deal with the sky, enhance it by adding blue to the clouds. Use the Pen tool and make a closed path on the sky area, no need to be too exact.

Right click on the sky and choose Make Selection

The path is now changed into a selection (with moving dots)
Step 3: Create a new layer and select the Gradient Tool, set the gradient color from #066caa to white and Reflected Gradient. You should use Reflected Gradient instead of Linear Gradient to enhance its contrast.

Step 4: Press Ctrl-D to deselect the selected area. Go to Filter>Blur>Gaussian Blur and use a radius of 25.2 pixels

Step 5: Now change the blending mode of this layer to Overlay. This mode keeps the color of your current layer and adding it to the below layer so we can see blue in our sky

Step 6: Repeat this technique (from step 2) with the yard but you should use orange gradient instead of blue gradient. If you feel a bit confused, follow the images below:
+ Make a closed path and turn it into a selection:

+ Add a suitable gradient:

+ Blur it and change the blending mode to Overlay:

Step 7: Repeat this technique one more time with the trees, you should use a small radius of Gaussian Blur


And here is the dreamy result we will acquire:

This technique produces a stunning photo effect without destroying the original background. It's based on Blur effect and Overlay mode. Remember you can easily adjust the colors and brightness in each layer by reducing its Opacity and Fill parameters.

Friday, July 9, 2010

Adobe Photoshop 12.0.1 CS 5 Ext Portable

Adobe Photoshop 12.0.1 CS5 Ext Portable | 87MB


The professional image-editing standard and leader of the Photoshop digital imaging line. Adobe Photoshop software, the professional image-editing standard and leader of the Photoshop digital imaging line, delivers more of what you crave. Groundbreaking creative tools help you achieve extraordinary results. Unprecedented adaptability will let you custom-fit Photoshop exactly to the way you work. And with more efficient editing, processing, and file handling, there's no slowing you down.


Create with unmatched power

Timesaving file handling with Adobe Bridge (formerly the File Browser)

Multitasking
Take advantage of compact floating mode in Adobe Bridge to process images while simultaneously working in Photoshop.
Viewing options
Easily browse your Adobe Creative Suite and other graphics files in Adobe Bridge; present your images with features like Slideshow and Filmstrip mode; scale thumbnails to any size using a slider; and view and edit metadata.

Automated batch processing
Automatically process batches of images in Adobe Bridge to rename, convert format, adjust exposure, create a web gallery or Adobe PDF Presentation, and more.

Rating and labeling
Quickly rate and label photos in Adobe Bridge so you can instantly bring up your best shots.

Sophisticated search
Easily find any image using sophisticated search capabilities in Adobe Bridge that let you specify a variety of parameters. Save searches as Collections that you can recall anytime.
Professional color and tone control

Match Color command
Achieve a consistent look between package shots, fashion photos, and more by instantly matching the color scheme of one image to another.


Download

Code:
http://rapidshare.com/files/405240615/devilsfunhouse.orgA_d_Phot_12.0.1_Portable.rar
or
http://hotfile.com/dl/52858552/91881d3/devilsfunhouse.orgA_d_Phot_12.0.1_Portable.rar.html

Sunday, June 27, 2010

Realistic View Tears on Face

In this Photoshop tutorial I would like to invite your attention to the unique technique how to make realistic view tears effect.
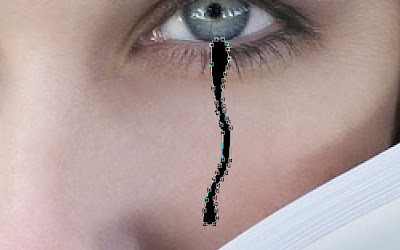
So, in the beginning you should find a good picture to work with. You can try to find it on stock photo web sites or also can use this. Open up the picture. Then select the Pen Tool and try to make good form of the tear with black color.


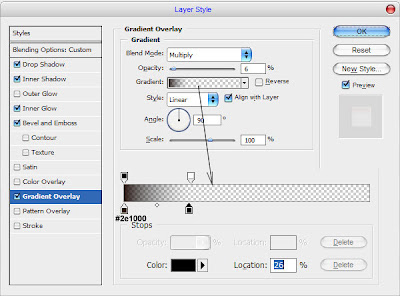
Pay your attention that the form must be how much more uneven to be similar to a real tear. When we are done with form, then change layer mode to Screen for the current layer and apply following Blending Options:
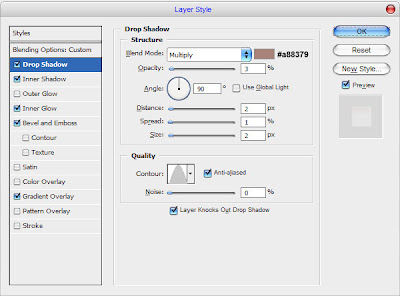
1. Drop Shadow
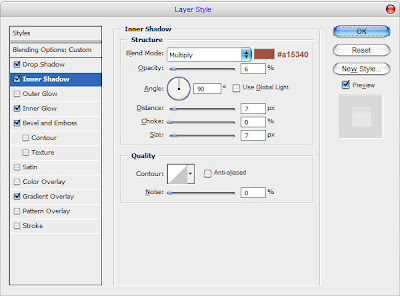
2. Inner Shadow
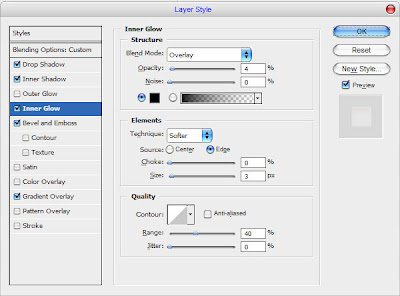
3. Inner Glow
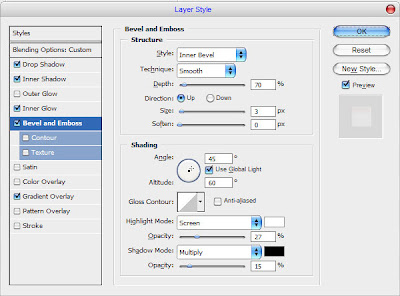
4. Bevel & Emboss
5. Gradient Overlay


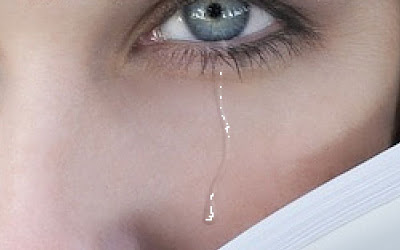
The result should be next:


Looks good, but not so realistic for now. I would like to bring some white glare to this form. Select the Pencil Tool and brush about 1 pixel, then make a few dots with white color on the new layer like on my picture below.


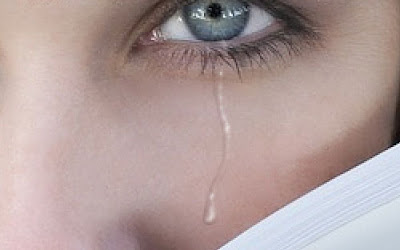
After that apply Blur Tool to current layer.


We got a nice realistic view result isn’t it? Don’t be afraid to experiment and you will get your own cool effects!

Monday, May 31, 2010

How to Sharpen Photo without Increasing Noise Visibility


Sometimes it happens that we need to sharpen photos for which there is noise, for example, pictures taken at night. But overall increase in photo sharpness increases and the noise visibility also. How to be in this situation? I can show you one method in Photoshop, how to avoid it.

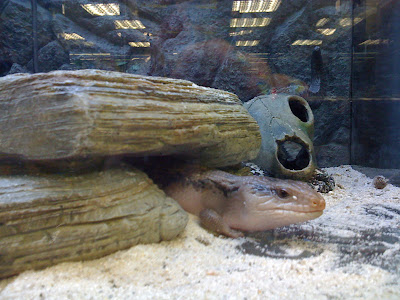
First of all you should find some appropriate photo to work with. I prefer to use this one below.

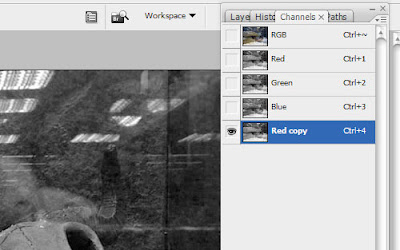
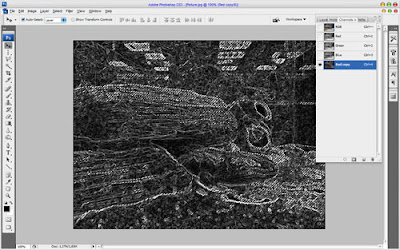
Open up this photo and start the tutorial. Go to Channel panel (Window > Channels). The first step is to look at the channels palette and determine which color channel best represents the area we want to capture. To the right, shown from top to bottom, you can see the red, blue, and green channels for this image. It’s obvious that the red channel contains the most information because it is most light. Click on the red channel and drag it down to the new channel button to create copy of it.

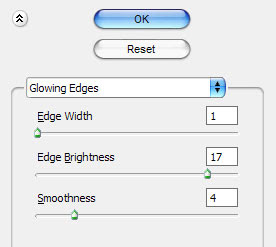
We got the copy as you can se on the above picture. Then apply for copied channel Filter > Stylize > Glowing Edges with similar settings to these:

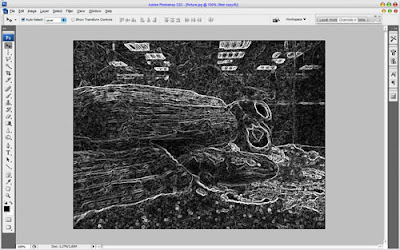
Now we have effect like this:

Hold the Ctrl button and click the Red copy thumbnail in the channels palette to load selection of this channel.

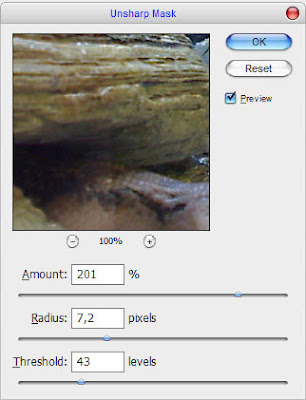
After that we can delete this channel: click on the Red copy channel and drag it down to the delete current channel button to delete it. Then go to layers palette (Window > Layers) and press Ctrl+H to hide selection temporary, but don’t remove selection for now! It is important! Then apply Filter > Sharpen > Unsharp Mask with some suitable presets for the photo. Pay your attention that for each photo presets should be individual. I tried following presets:

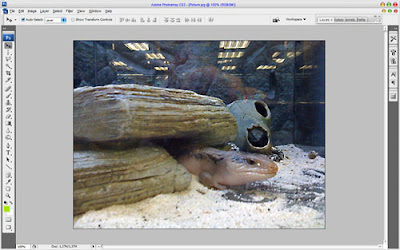
See the result now:

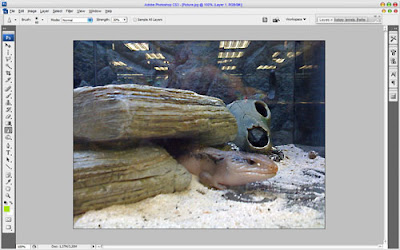
Now, we have some selected area, but it is hidden for now, press Ctrl+H again to make it visible. Then press Ctrl+J to duplicate selected area to new layer. Then apply Filter > Sharpen > Sharpen Edges:

That is it for now. We sharpened photo without increasing the noise visibility. Hope, you got some interesting knowledge from this tutorial.

Sunday, May 23, 2010

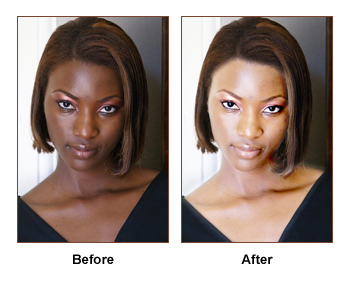
Fairness Cream - Before and After Effect

In this tutorial we will take close up of a face with dark complexion and turn into a significantly lighter tone to create an after effect of using the cream. This effect can be performed on any part of the body.

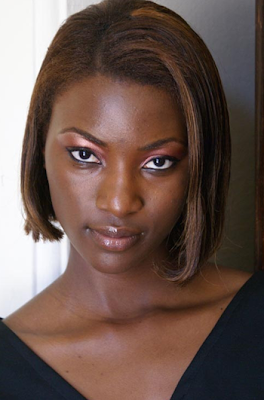
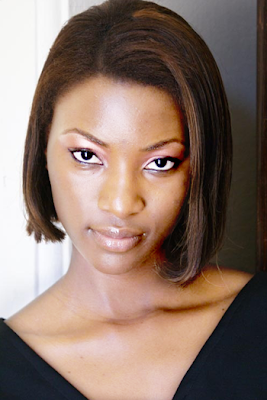
1. We need to choose image, I picked up the one below, with a darker skin (to achieve better effect).

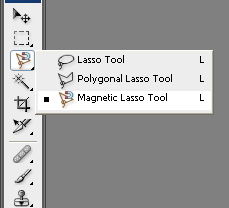
2. Now, we need to create the selection of area of face on which we are going to work. You can choose any selection method you want. For this image magnetic lasso would be a great time saving selection tool.

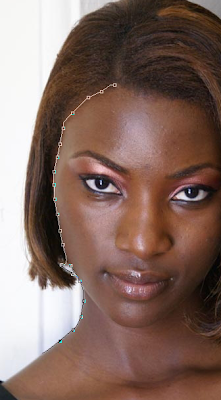
3. Using magnetic lasso tool, click on any starting point on the boundary of her face. Then just keep moving on sides of the skin area till you reach the starting point again.

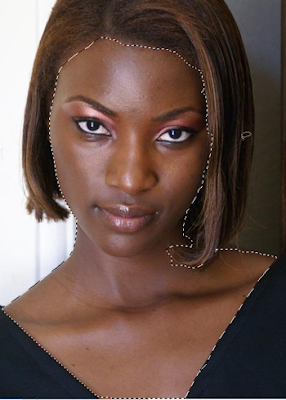
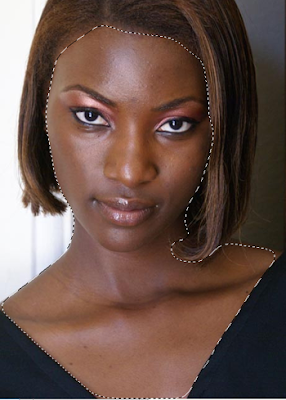
4. Once you complete it, this will convert into a selection as shown below.

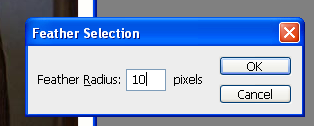
5. Now press Ctrl+Alt+D to feather the selection. Set Feather Radius to 10. Just like shown on picture below.

The selection will smoothen up as shown below.

6. Now we need to copy and paste our selection in a new layer. Do that by pressing Ctrl+C and then Ctrl+V, and you should have a new layer containing only skin we’ve selected before.
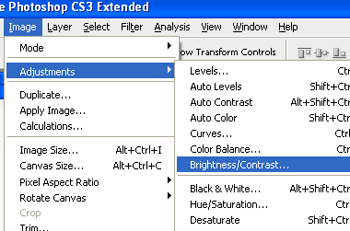
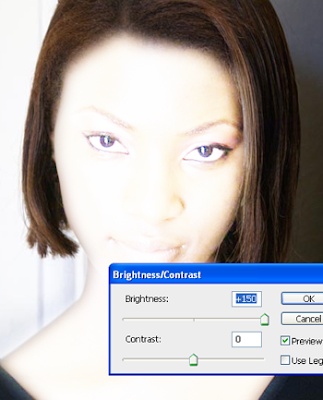
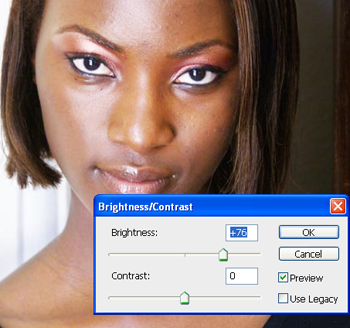
Stay on this new layer and go to Image menu select Adjustments>>Brightness/Contrast. (see the picture below)

Increase brightness to a high value. Tick the “Preview” box (if it isn’t ticked already) and you will see the effect in action in real time. See the image below to check settings I used.
Note that, this values may not be perfect for your pictures so it’s the best for you to choose them as you wish or like

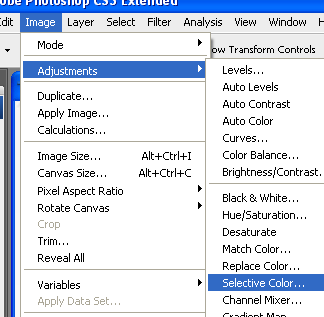
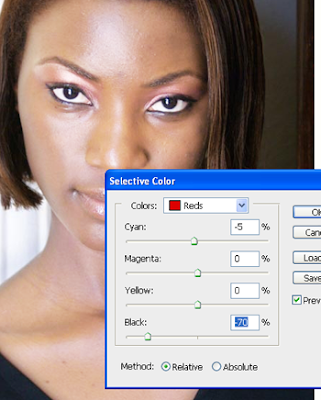
7. From Image menu select Adjustment>>Selective color (just like shown on picture).

Make sure, selected color range is Reds on top. Then reduce Black to a large negative value as shown below. You may also try reducing cyan too and see in the preview if its lightens the skin color.

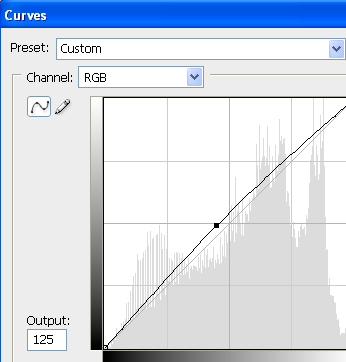
8. Again from Image menu select Adjustments >> Curves or press Ctrl+M to open curves editor. Click in center and drag a little upwards. Don’t overdo this or else the image will look burnt. Take a look at the picture below.

Now in Layers window duplicate the face layer and go to Image > Adjustments > Brightness/Contrast. Increase brightness to an insanely high value.

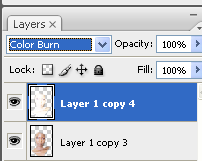
Go to Layers window once again and change layer mode (on duplicated layer) to Color burn.

And voila! You’ve done it.
Here’s my result.

A closer look (before & after).

Wednesday, April 21, 2010

Sexy retouch for a soft skin

By Dirk Metzmacher

You might have asked yourself now and then „How do I make a soft skin without destroying the pores?“. In this workshop I’ll show you how this kind of touch-up works, and how you can conserve the pores. This goes from basic retouch up to powdering the skin.


Basic retouch
Before we start softening the skin, you should perform a so-called basic retouch. This means that zits, moles and other blemishes are removed. How much you want to weaken things depends entirely on your personal taste, of course.

Before we start softening the skin, you should perform a so-called basic retouch. This means that zits, moles and other blemishes are removed. How much you want to weaken things depends entirely on your personal taste, of course.

Contrary to the Clone Stamp tool which transfers areas exactly as in the original, the Healing Brush tool works by cross-calculating brightness values and thus removing blemishes very cleanly, adapted to the surrounding area.

Skin powdering
Now we get around to doing the so-called skin “powdering”. Duplicate the layer with Layer > Duplicate Layers or Ctrl+J and give the new layer a Vivid Light blending mode.


Press Ctrl+I or use Image > Adjustments > Invert to invert the current layer. Whatever you may see on the screen now: Don’t get confused by that, we’re still on the right track even though it might look a bit funny.

Apply Filter > Blur > Gaussian Blur with a radius of about one pixel. Here you should choose a radius just small enough so you can barely see the pores anymore.

Next, use the High Pass filter which you can find under Filter > Other. With this one it’s a matter of taste how strongly you apply it. I usually keep the radius between 20 and 40 pixels.

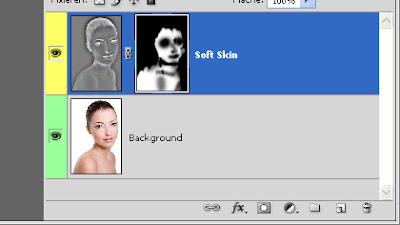
This change should not be applied everywhere. Select Layer > Layer Mask > Hide All to create a black mask that hides all layer content for now.

Tip: You can also create a black mask by clicking on the Add Layer Mask button in the layer palette and holding the Alt key.


Now use a white foreground color to paint the changes back into the image, but only on the skin. Don’t start off with an opacity of 100%, but experiment a little with the strength instead. You’ll see how the skin becomes noticeably softer and the pores are kept intact.

Tip: If you select Filter > Convert for Smart Filters right after inverting the image, you can do all this retouching in a completely non-destructive way.

Monday, March 15, 2010

How to Use Gaussian Blur in Photoshop

Gaussian Blur is a filter that blurs an image. But it's also the math behind the Feather command, drop shadows, and everything that is soft in Photoshop. And here's the crazy thing: You can sharpen an image using Gaussian Blur!